Navigation Techniques: Setting A Map
Setting (or orienting) a map is the most essential navigation skill - if you know nothing else, know this.
Previous I have covered contour lines, and how they translate to land forms. When out navigating, however, we need a way to translate what we see on the map to what we see (and indeed don't see!) around us - this is where setting comes in.
What is Setting a Map

[Source]
A map that has been set, is simply one that has been turned so that north on the map points north*. Once this is done the features on the map will be correctly positioned relative to your location. Some people find it useful to mark their current position on the map using their thumb.
It is good to get into the habit of always orienting a map before starting to read it. When walking, you can 'drive' the map to keep it constantly set as you change course.
* Strictly, the map should face grid north, but in most cases (particularly in the UK) magnetic north will suffice.Visually Setting a Map
In clear conditions, it is often easiest to set the map visually. This involves turning the map until the features you can see align with their relative positions on the map. Linear features, such as a main road or a river can be particularly useful for this allowing the map to be set accurately - providing you're not 180° out!
It can be useful to pick a feature (a church is a classic example) and check that it's position relative to you is reflected on the map once it's set to ensure that the map is set correctly.
Exercise
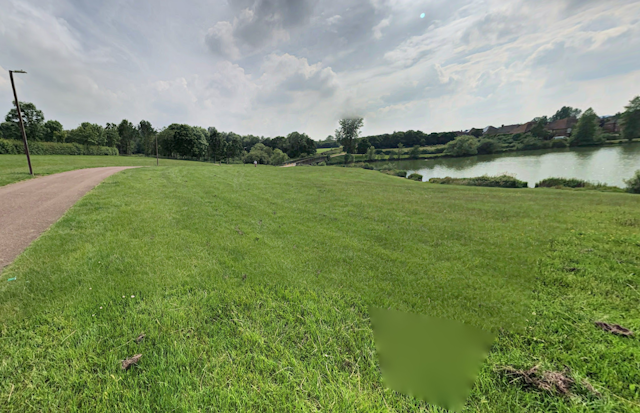
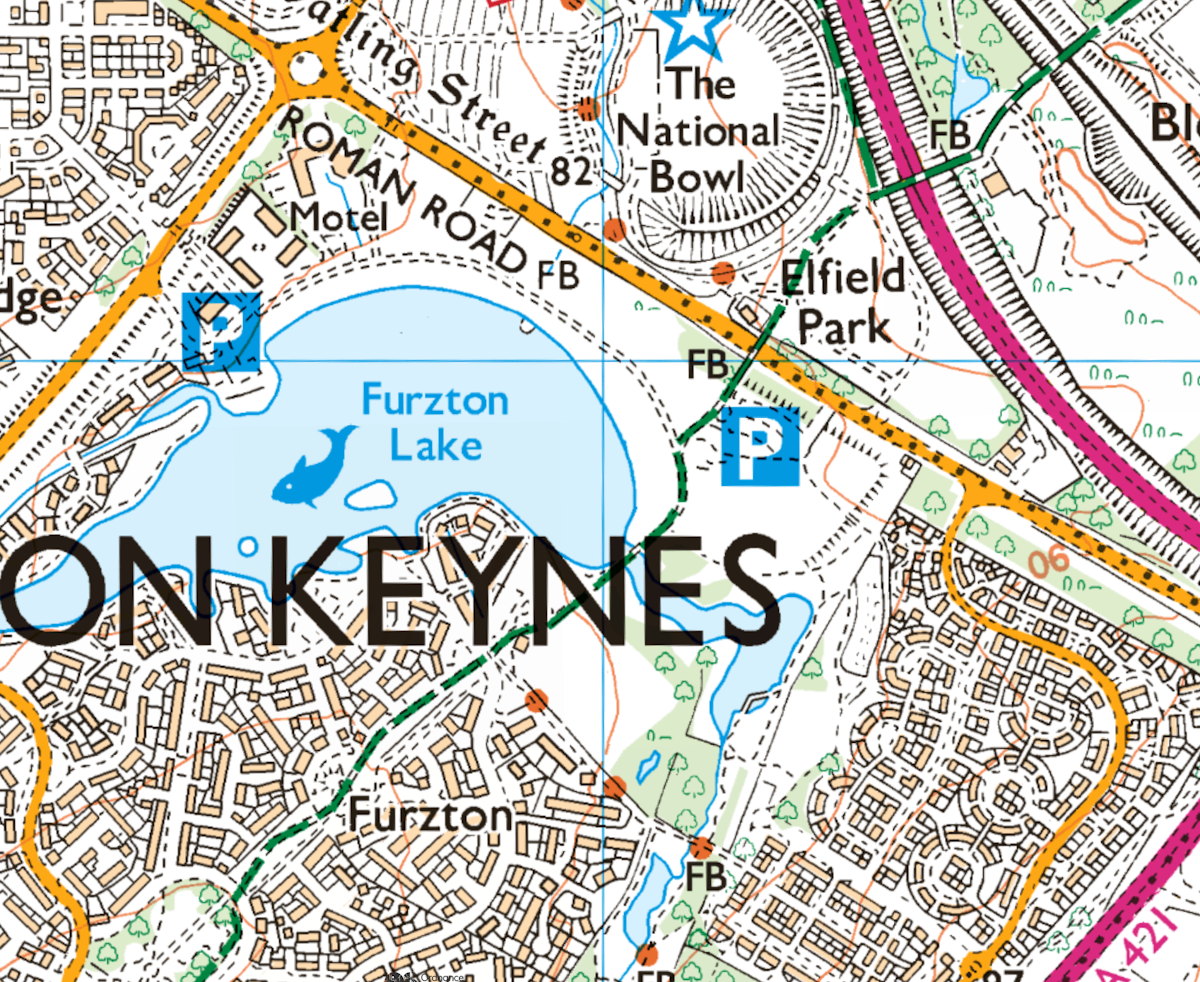
Below is an exercise to practice setting a map. Rotate the map to the correct orientation using the image as a reference, with your position on the map marked by an indicator.

Setting using a Compass
In certain conditions it may not be possible to set the map visually, either because there are no identifiable features around you, or they are blocked from view (perhaps by weather conditions). In this case you can use your compass - simply rotate the map so that north on the map (usually the top), points in the same direction as north on the compass needle. Given that grid north and magnetic north are not the same, we should account for this to be complete accurate - however, this difference is very small in the UK so for now we can prioritise simplicity over complete accuracy.
One technique that some people like to use is to first rotate the compass housing until the the orientation indicator (the arrow) sits directly underneath the north section of the compass needle. Once this is done, the map can be rotated until the vertical grid lines are parallel to the orientation lines and compass needle.
Exercise
Once again you can try this out below. There's no indicator this time as this method doesn't rely on knowing where you are on the map. Rotate the map (you can also rotate the compass housing if you wish), and set it using the compass.
#GoForIt
I hope you found this guide to setting a map helpful and informative. By following these simple steps, you'll take the first steps towards mastering the art of navigation and can explore the great outdoors with confidence. Remember to always set your map before reading it, and keep it set as you move along. This way, you will always know where you are, where you are going, and what to expect on your journey. Happy exploring! 😊